
This tutorial is on our instructables site to, Click here to check it out!
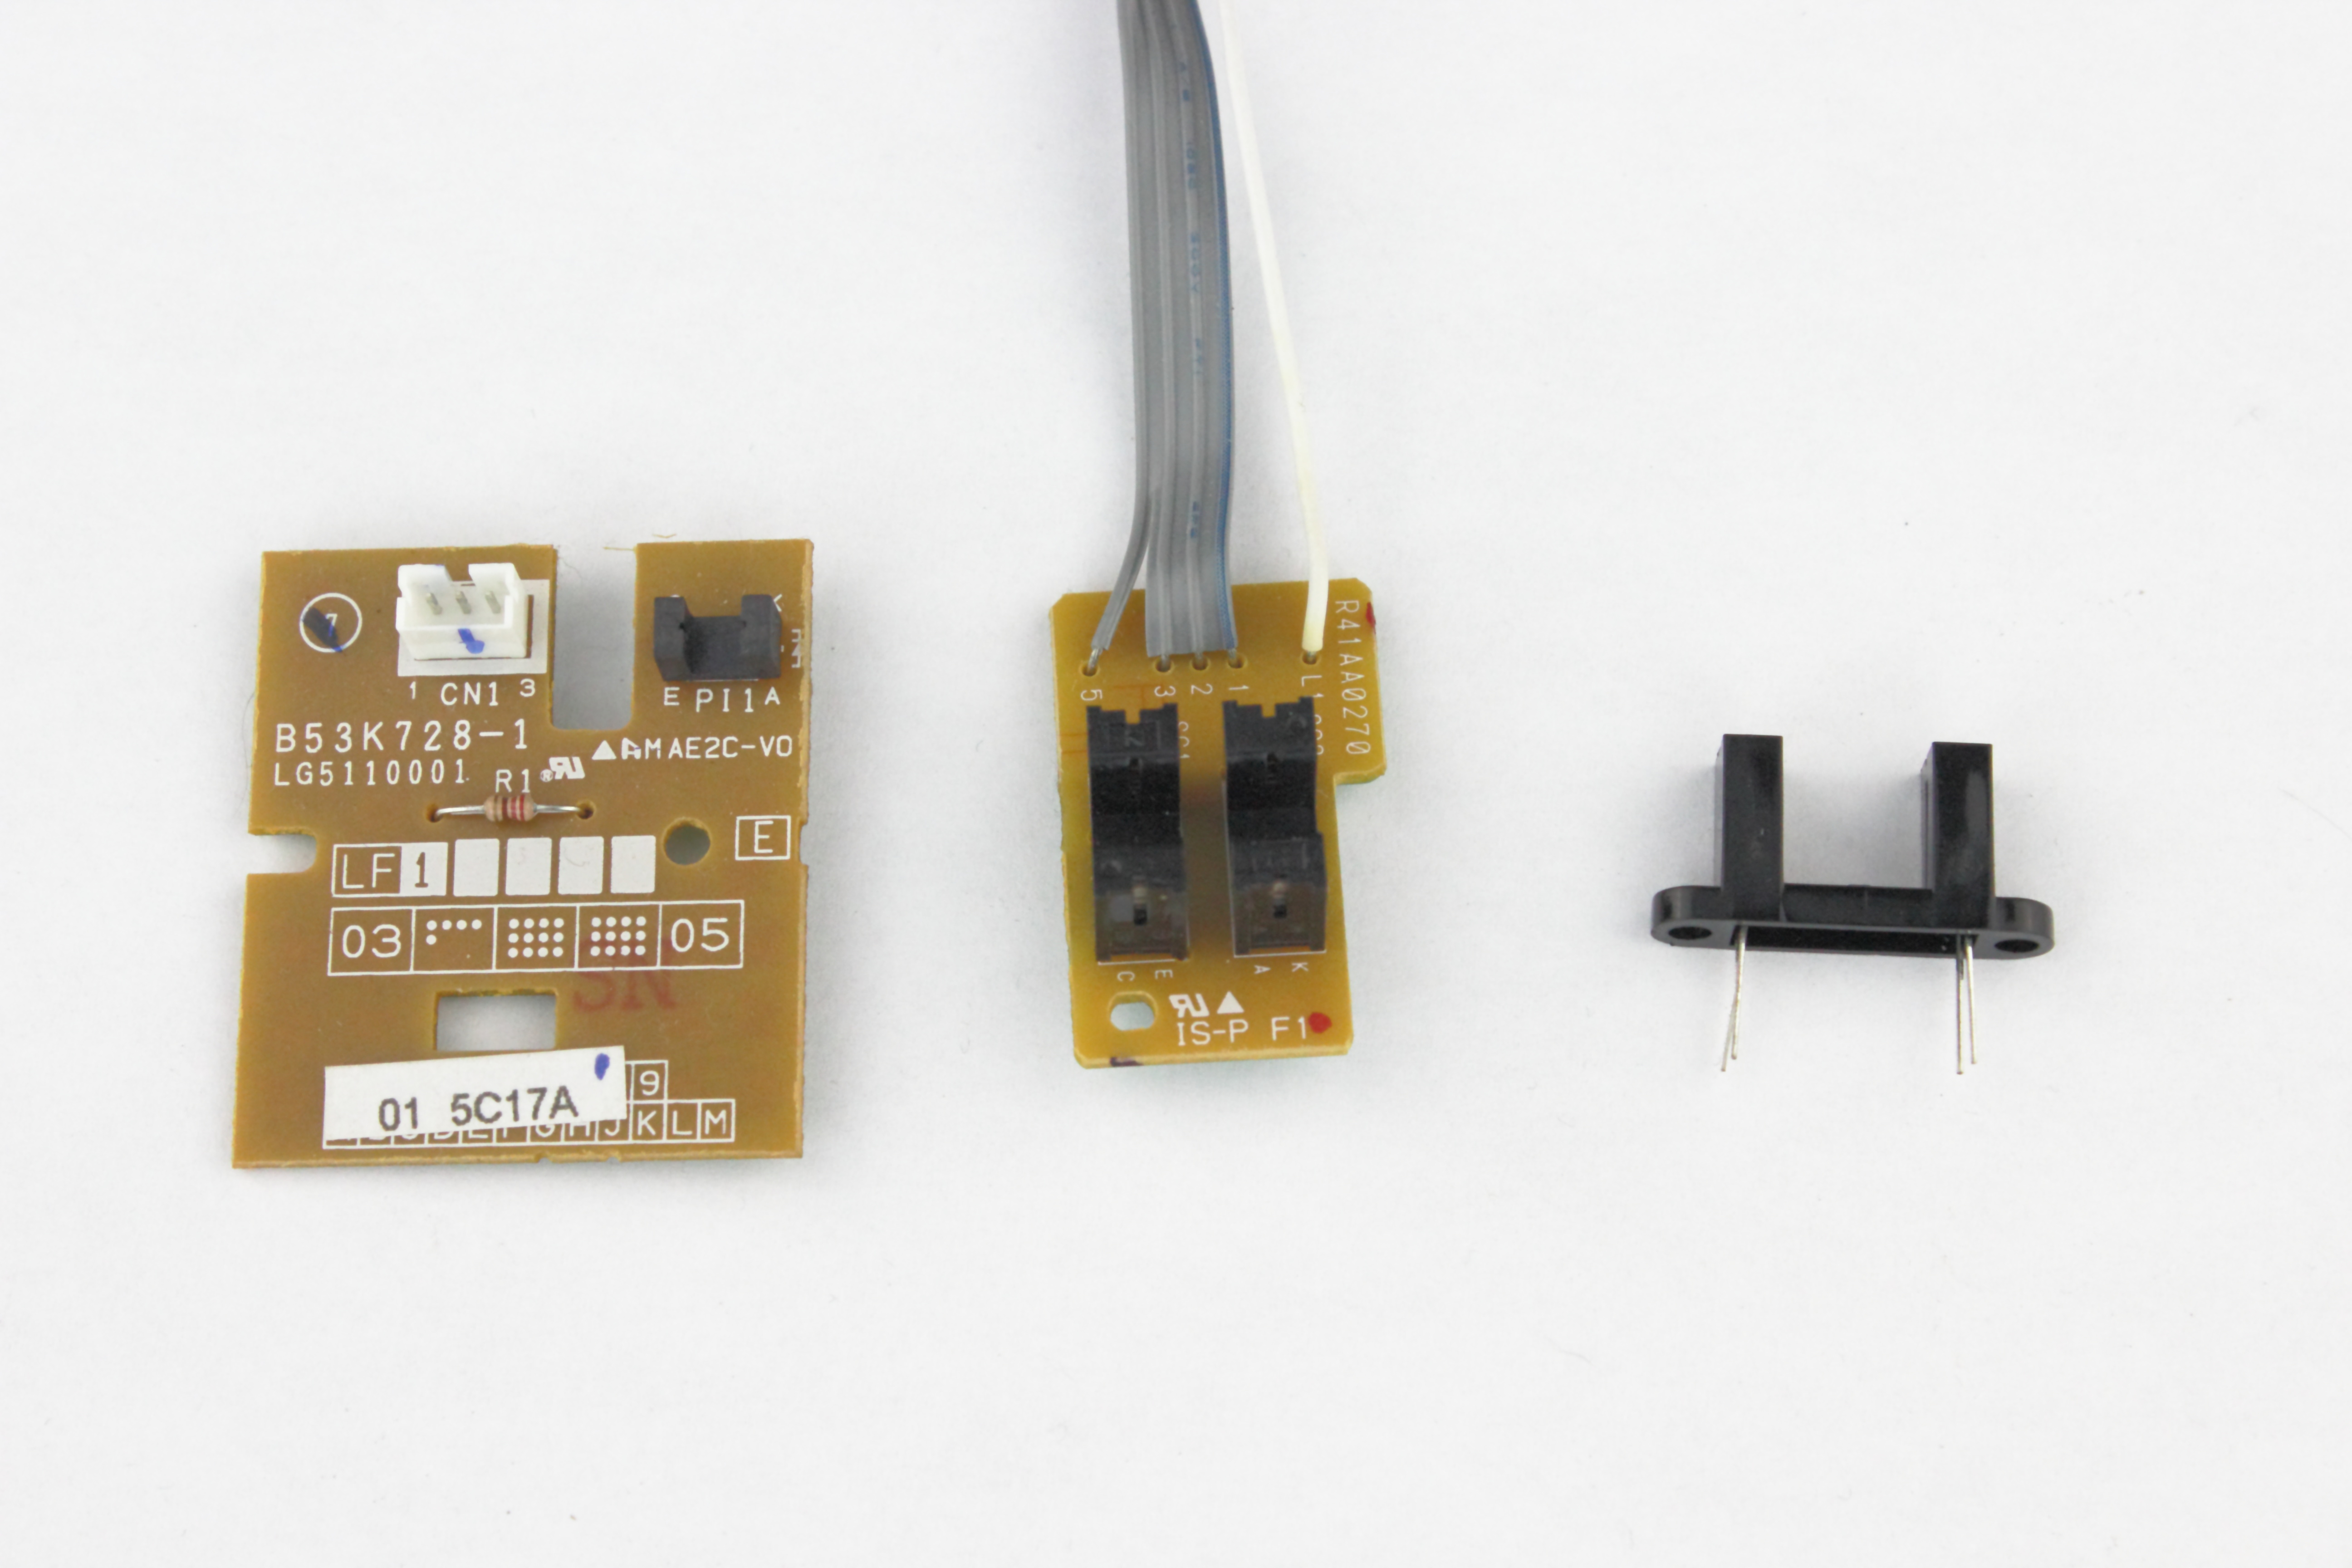
A photo interrupter is a device that is made up of a infrared led and a photo transistor with a gap between the two of them, When something is placed between the gap the light is cut and the current flow through the photo transistor is reduced or stopped. The picture above shows three photo interrupters, the first two are salvaged from old printers and the third is a HY810H that I got on ebay (10 of them for under $5)…
In this tutorial I will show you how to use one to trigger a tone alarm to go off when something is placed in the photo interrupters gap, This circuit can easily be modified to trigger many things if the light is interrupted..
PARTS YOU WILL NEED:
1 X 560Ω resistor.
1 X 56KΩ resistor.
1 x piezo or small speaker.
1 X photo interrupter (I used a HY810H I got from ebay).
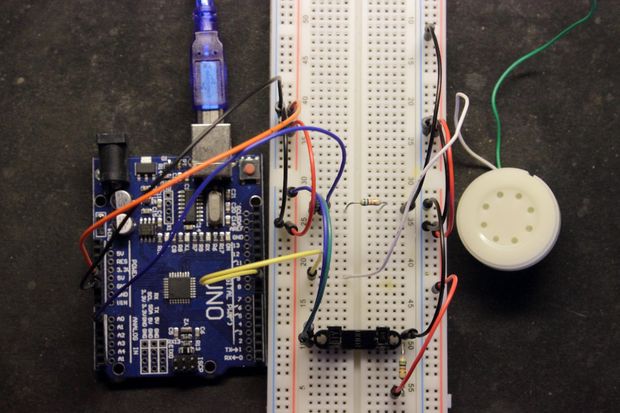
ARDUINO board, bread board & jumper wires….
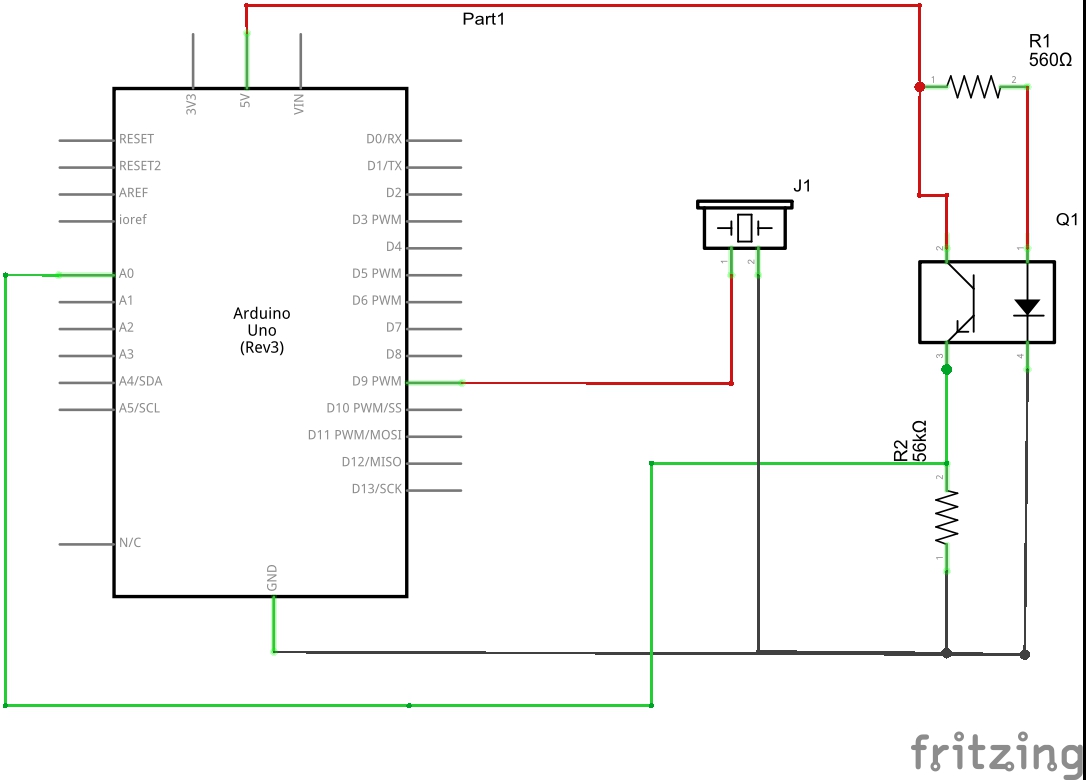
The picture above shows the simple circuit you will need to build.
The 560Ω resistor connected to the IR led is to cut the arduinos voltage from 5V to about 1V, The HY810H IR led input max voltage is 1.6V and the 560Ω resistor brings the arduinos 5V supplied voltage down to 1.17V (well below the tolerance but high enough to get good readings from the photo transistors output).
The 56KΩ resistor is connected to the photo transistor to work as a voltage divider to get your analog reading to your arduino board, I tried this circuit without the voltage divider and it would not work worth a crap. When I set it up as a voltage divider I got very good and stable readings to the arduino board!
The rest of the circuit is pretty self explanatory so lets move on to testing it out……….
Now that you have the circuit built lets load up some code and try it out.
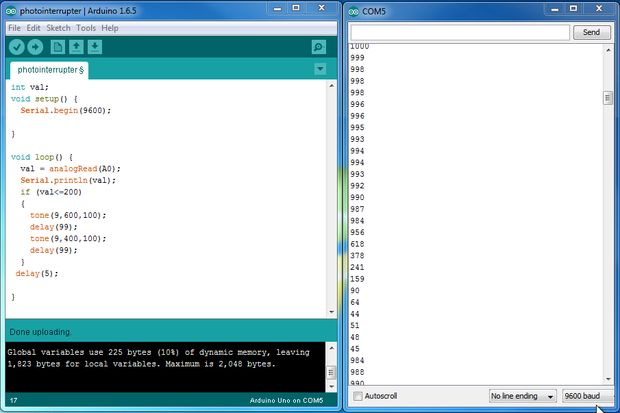
Just copy and past the code below into your ARDUINO ide and up load it to your ARDUINO.
int val;
void setup() {
Serial.begin(9600);
}
void loop() {
val = analogRead(A0);
Serial.println(val);
if (val<=200) // change this value to set the triggering threshold
{
tone(9,600,100);
delay(99);
tone(9,400,100);
delay(99);
}
delay(5);
}
Now that you got the code uploaded lets move on to testing it out!!!
Now that you got the code uploaded and running open up your serial monitor (just to monitor the analog input for tweaking the program) and find something to put in the photo interrupters gap to set the alarm off. If you are using a different photo interrupter you may need to modify the code to work optimal for you, but if your using the same stuff as me just put a piece of paper between the gap and the alarm should go off…
If you have any problems or have a question please leave a comment on our facebook page!!!!!


