
This tutorial will show you How to set up and use a 1602 I2C serial LCD with your ARDUINO. , In this tutorial I will be using a ARDUINO UNO but the connections will be similar for all ARDUINO boards.
The video below shows the LCD in action!
How to set up and use a 1602 I2C serial LCD with your ARDUINO.
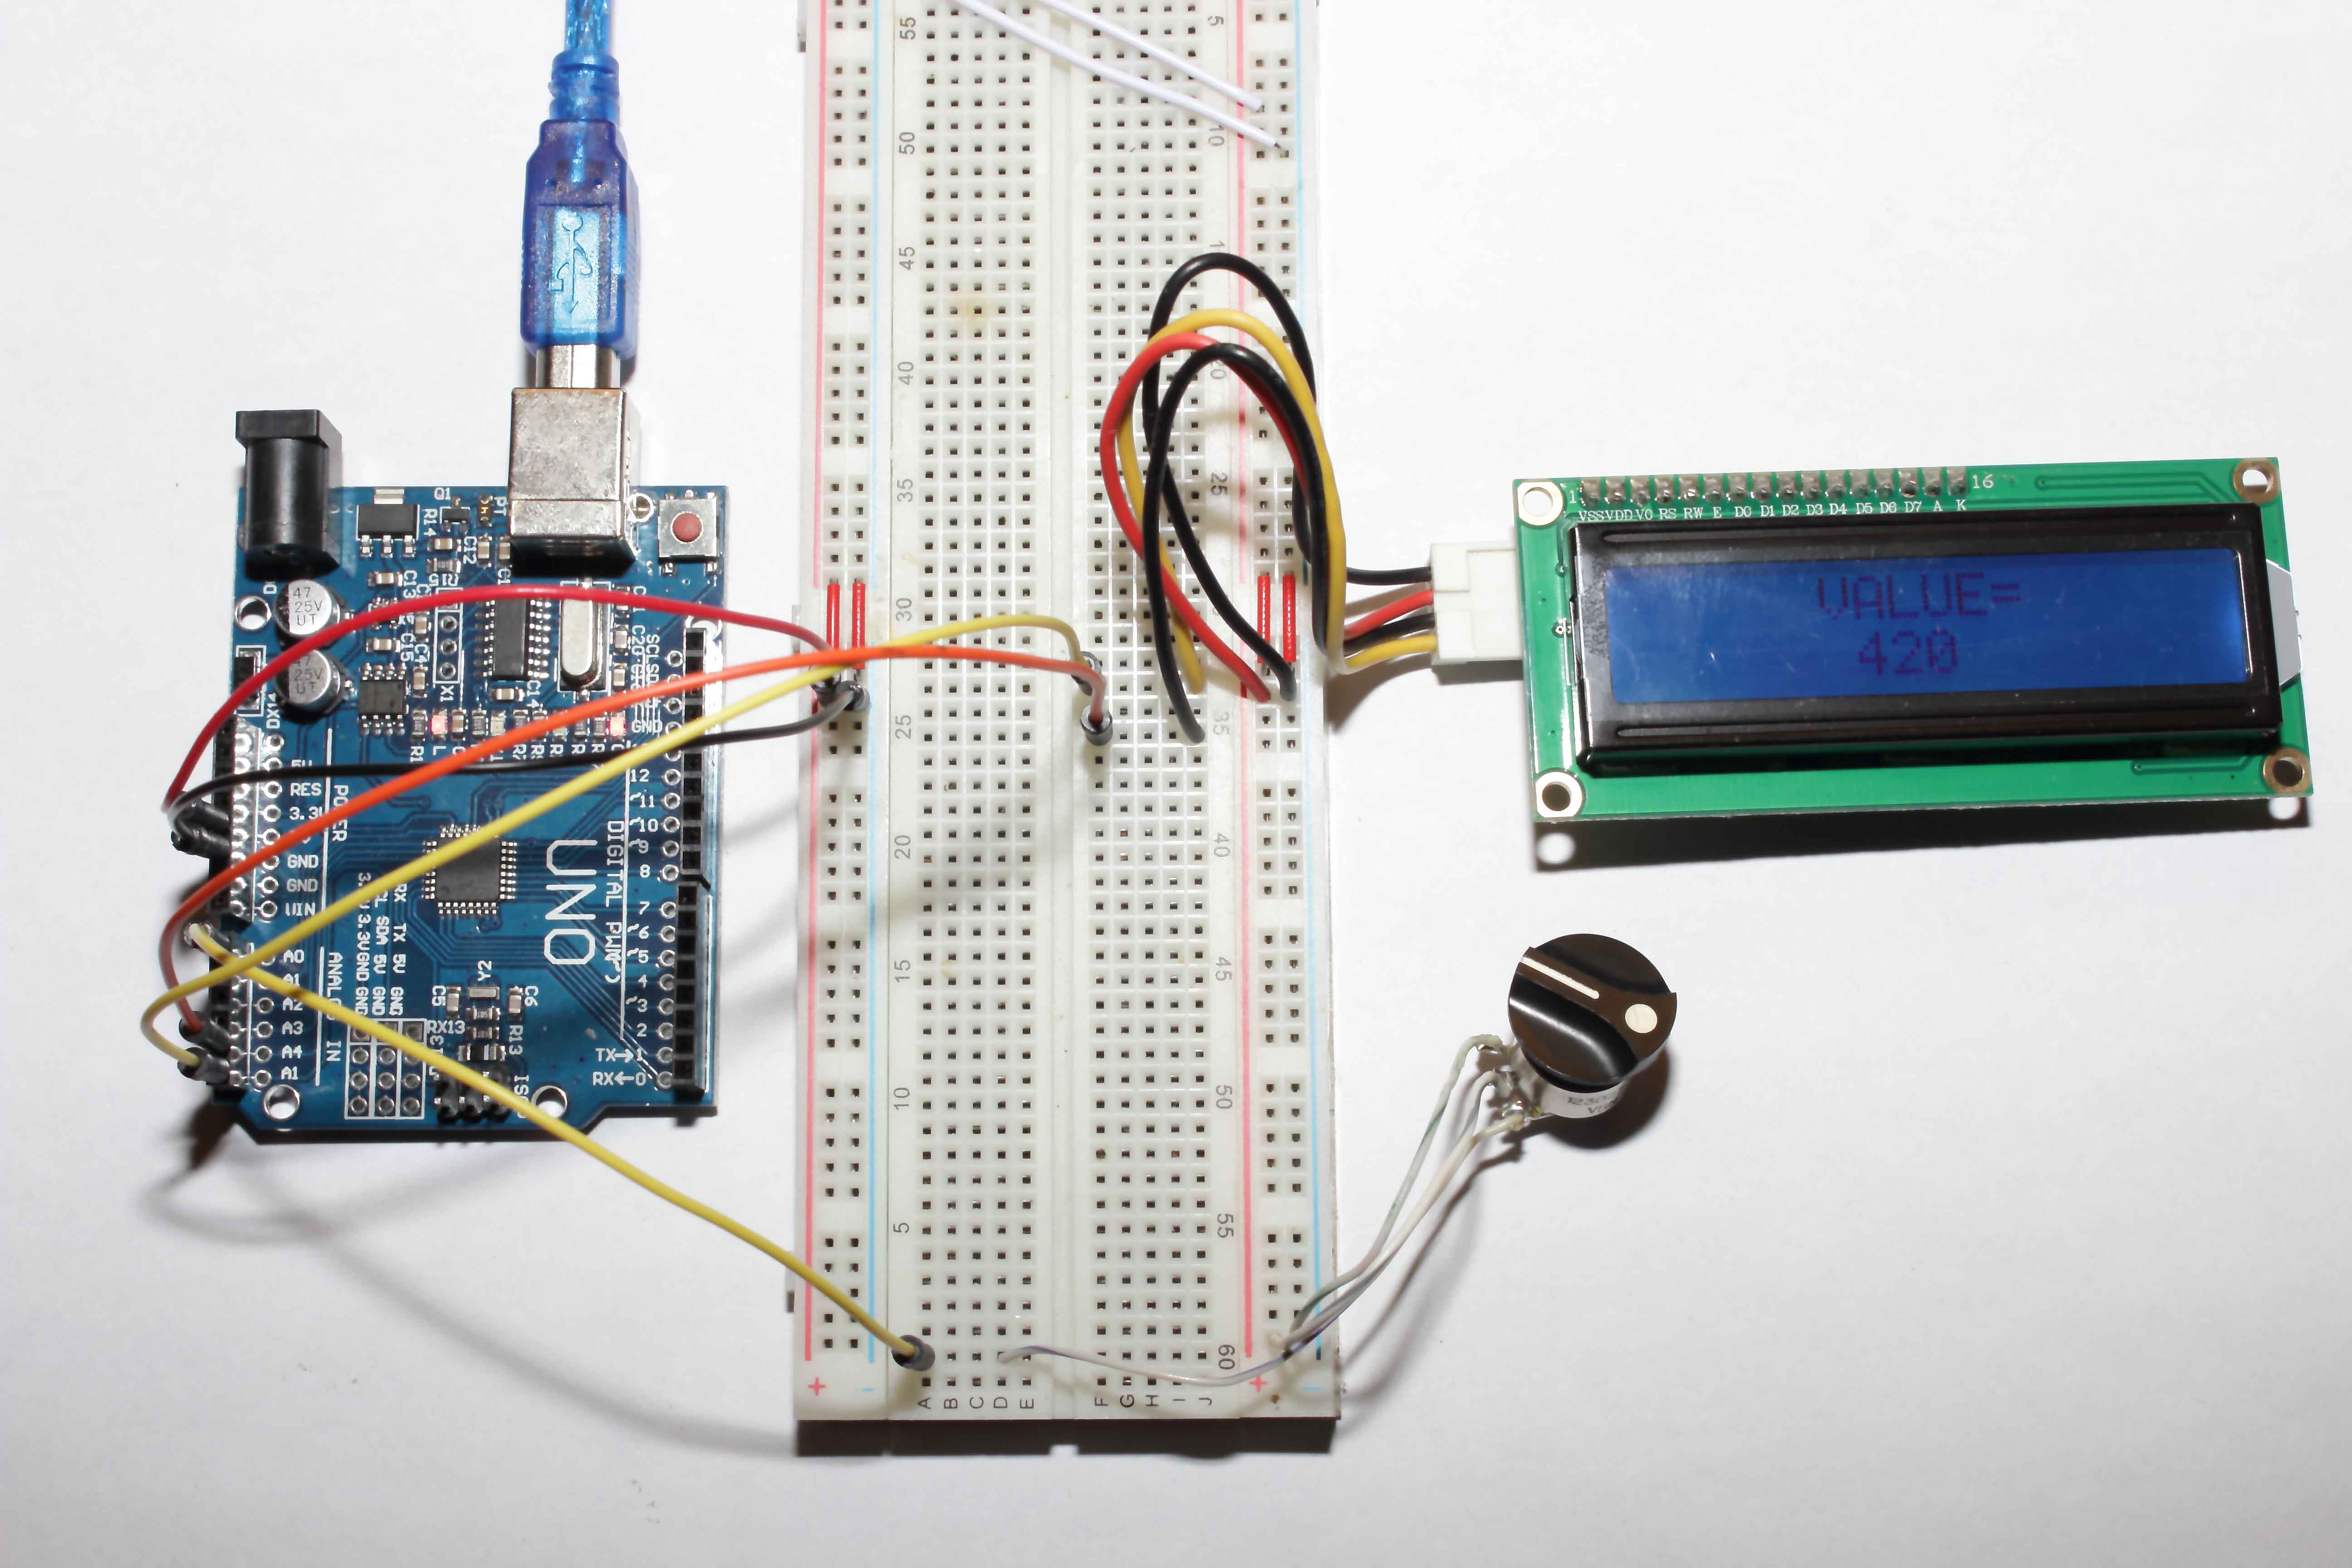
Connecting the I2C lcd to your ARDUINO is simple. First connect the VCC & ground from the LCD’s I2C pins to the power and ground pins of your ARDUINO board, Next connect the SCL pin to pin A5 on your ARDUINO board and the SDA pin of your I2C LCD to pin A4 on your ARDUINO board.
Parts List.
#affiliate links#
For the demonstration of how to use the I2C LCD we are going to connect a potentiometer to the ARDUINO and display the value on the LCD display, Connect the middle pin of the pot to analog pin A0 on your ARDUINO and the other two pins to ground and power..
If you know the address of your 1602 serial I2C LCD you can skip the next step!!
Detecting your I2C address.
If you don’t know the LCD’s I2C address just copy and past the following code into your ARDUINO IDE & upload it to your board, Open your serial monitor and write down the address that is displayed on the monitor. This code and more info about it can be found at: http://playground.arduino.cc/Main/I2cScanner
Time to play with the LCD!!
You will need to download and install the following library for your I2C serial LCD to work : https://bitbucket.org/fmalpartida/new-liquidcrystal/downloads… Download the 1.3.4 version!
How to set up and use a 1602 I2C serial LCD with your ARDUINO.
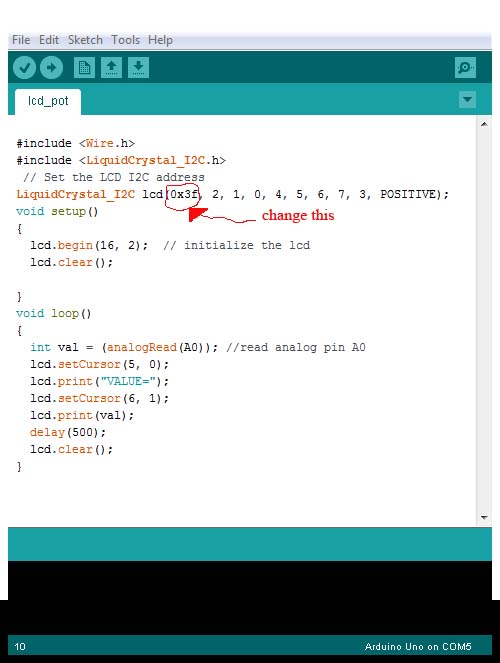
#include <Wire.h>
#include <LiquidCrystal_I2C.h>
// Set the LCD I2C address
LiquidCrystal_I2C lcd(0x3f, 2, 1, 0, 4, 5, 6, 7, 3, POSITIVE);
void setup()
{
lcd.begin(16, 2); // initialize the lcd
lcd.clear();
}
void loop()
{
int val = (analogRead(A0)); //read analog pin A0
lcd.setCursor(5, 0);
lcd.print(“VALUE=”);
lcd.setCursor(6, 1);
lcd.print(val);
delay(500);
lcd.clear();
}
If you have any questions or comments please post them on our Facebook page.
Also if your looking for some more ARDUINO projects or info check out our projects page.
How to set up and use a 1602 I2C serial LCD with your ARDUINO.


