

The first thing you will need to do is get the Arduino IRremote library from this link IRremote library download..
The site has the instructions on how to download and install the library.
The installation of the library is easy, just follow all the instructions to make sure it will run properly.
After you get the library installed the next step is to find a remote to use and test it to see if it works. If you are not sure if your remote works testing it is simple, if you look at it when you push a button you wont see anything. To see if it is working all you will need is a digital camera, The camera on your phone will work fine. Turn the camera on and point the remote at your camera, when you push one of the buttons on the remote you will see it light up on your camera screen. You can’t see IR light but your camera can.
The parts you will need
IR Sensor (got mine out of a junk DVD player).
100uF capacitor.
Resistor to bring the voltage to the right level for your IR sensor if needed.
Breadboard.
Jumper wires.
Any Arduino board.
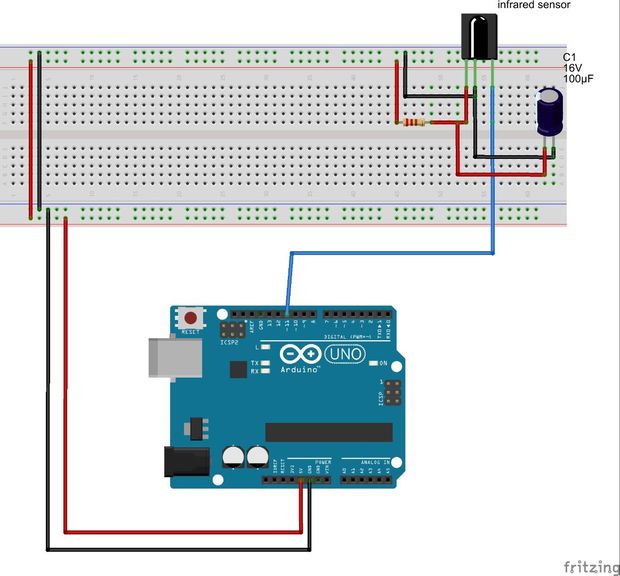
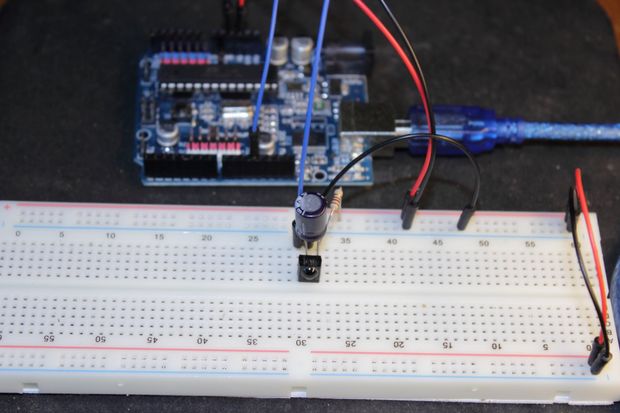
The Circuit
The picture above show the simple bread board lay out of the circuit you will need to build, The pin configuration of your IR sensor may be different so please look up the data sheet and modify the construction as needed…
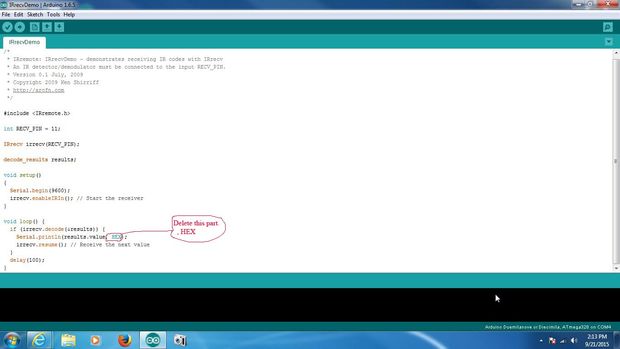
Now that you have the circuit built its time to map your remote. The first thing to do is open the arduino IDE and then go to examples and open IRrecvDemo. After you have it open go down the code till you find the line that is circled in the picture below and delete the ( , HEX), the reason to do this is because it will be easer to work with when you are writing your code. Using HEX numbers will complicate things unless you really under stand how to use them when writing your arduino sketch.
Next its time to get your remote codes, All you have to do is open the serial monitor then point your remote at the IR sensor and push a button. When you push a button a number will come up on the serial monitor, write that number down so you can use it when writing your sketch. If you hold down a button you will notice that a different number will show up and it will be the same for any button you hold down, write this number down two it will be useful if you want to have values change in your sketch if you hold down a button.
Now that you have mapped your remote its time to use the codes to control something, the following sketch will show you how to control the speed of a old computer cooling fan with your remote.
The following code I wrote to control a 12v fan, you will need to use a transistor and a 12v power supply for this to work. The code is pretty straight forward so I’m not going to explain it, just put your IR codes in where it says too be placed and your good to go..
#include <IRremote.h>
int RECV_PIN = 11; //conect IR receiver output to pin 11
IRrecv irrecv(RECV_PIN);
decode_results i;
int fan = 9; //conect fan to pin 9
int dir =0 ;
int val = 0;
void setup()
{
Serial.begin(9600);
irrecv.enableIRIn(); // Start the receiver
pinMode(fan, OUTPUT);
}
void loop() {
analogWrite(fan, val);
if (irrecv.decode(&i))
{
if (i.value == put your code here && dir == 0) // put the ir code for fan speed + here
{
val = val + 10;
dir = 1;
}
else if (i.value == put your code here && dir == 1) // this is where you put your hold down button code
{
val = val + 10;
dir = 1;
}
else if (i.value == put your code here && dir == 1) // put the ir code for fan speed – here
{
val = val – 10;
dir = 0;
}
else if (i.value == put your code here && dir == 0) // this is where you put your hold down button code
{
val = val – 10;
dir = 0;
}
irrecv.resume(); // Receive the next value
}
val = constrain(val, 0, 255);
Serial.println(val);
}
I put this together fast and had a few beers when doing it so if anything is not working right please let me know. send message to [email protected] .


